AOP part 10: Coloured Gels Technique
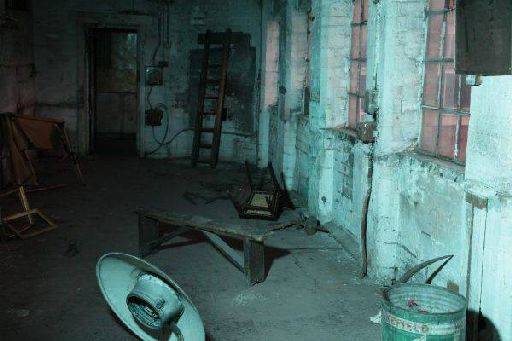
Here is a test shot using a straight daylight white balance but using the blue gel on the strobe. You get what you would expect - a blue cast to the whole space. But if you look closely, you can still see regular red brick work through the windows on the right.
The next step is to use the custom white balance function on your camera. Shoot a white piece of paper held in front of the strobe (at the correct exposure) and set a custom white balance from this shot.
This now means anything illuminated by the flash is correctly colour balanced.
Everything not illuminated by the flash goes somewhere else! Now the "something else" is a bit unpredictable, it is not always the opposite of the colour you are applying as it all depends on colour shift of the auto white balance.
This is a really old technique, back in film days you would have daylight and tungsten films chosen for lighting conditions. If you ended with the wrong situation you would use a corrective filter either on the light or camera.
You can, of course, achieve more subtle colour shifts. In fact I often shoot with "flash" as the white balance since this gives a warmer look to shots.
If you are shooting RAW, then your original RAW file is not affected by this white balance shift and you can mess around with it to your hearts content in post processing. This sequence only affects the JPEG file, not the RAW file.
The crucial thing is there is no other way to create this kind of wide illumination in a big space with a single light source.
share:
This is an excerpt from "Anatomy of a Photoshoot" which gives a complete breakdown of two days shooting with a full in-depth step by step review of everything that I do.
It is available on Amazon
or on
the store